This article covers two parts. How to install Pidgin in Windows (I used Windows 7) and how to configure your first account. I have added an example from Yahoo! (Messenger) but the procedure is similar to all the other supported chat networks.
Download Pidgin from official homepage. Please note that GTK package is required in order to be able to install and run Pidgin. Therefore, you have two alternatives. Download and install the GTK+ as an off-line installer (instructions on the same download page) or let Pidgin to download GTK+ during setup.
Back to installation: once you downloaded the setup file, open it and the program will require to choose the language for installation.

Make sure that you sign-out and closed any other chat application that can interfere with: Yahoo Messenger, ICQ, MSN Messenger and others.

This application use the "GNU General Public License" as a license agreement so make sure that you read it and if you agree, choose "Next".

Choose the components that you want. For example, I unchecked the "Start Menu" and I wanted a desktop shortcut. I also selected all the "URI" handlers and as you can see, the GTK+ Runtime is selected by default if it's not installed (don't change this). When you're ready, choose "Next" to continue.

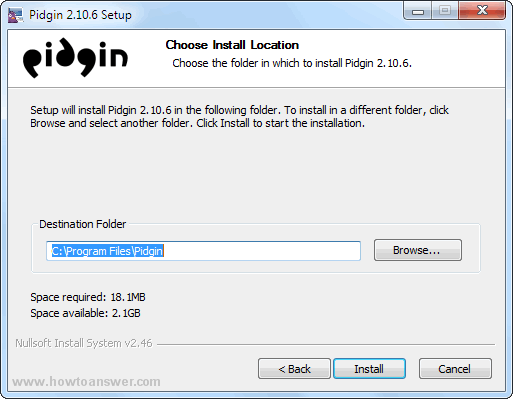
Like most applications, by default, Pidgin will install in "C:" partition using "Program Files" folder. It will create his own folder using the same name - Pidgin. When you're ready choose "Install".

As I said, if you already have or installed GTK+ before, you may skip this part. If you don't have it, the program will attempt to download and install. Occasionally, you may encounter this error (also provides instructions if it doesn't work).

When I wrote this article, I had to select "Retry" three times before it worked. If it's not working for you, the only way to solve this is to download the GTK+ package manually and install it. Then, you have to repeat the installation so the program will skip these steps. Anyway, on my third try I was lucky and GTK+ was downloaded successfully.

If everything went well with the GTK+, you will see how Pidgin starts to extract and install the required files. I skipped one window but if you can read "Completed" in the status window, Pidgin is installed.

This is where the setup part ends. If you can read the confirmation message "Pidgin 2.X has been installed" choose "Finish".

Pidgin configuration starts from here. Right-after the setup part, when you run the software for the first time you are required to add an account. To continue, select "Add".
Note: You have no IM accounts configured. To start connecting with Pidgin press the "Add" button below and configure your first account. If you want Pidgin to connect to multiple IM accounts, press "Add" button and repeat the procedure.
You can come back to this window to add, edit, or remove accounts from "Accounts-Manage Accounts" in the Buddy List window.

In this example, I will choose "Yahoo" protocol as I would like to replace Yahoo Messenger with "Pidgin". If you want to do the same or use another service, go to "Protocol" and select the needed chat network. Type your username and password and click on "Add".

Once you added a username, you will see this confirmation window. If you want to add another username on a different chat network, just repeat the procedure. The only difference is that you will see the following window and not the previous one (that will appear only when you install Pidgin for the first time).

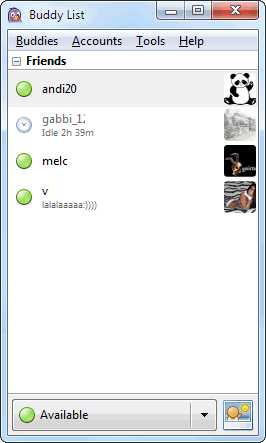
Once you added your first network, the program interface will log you in. As you can see, that's how the interface looks with Yahoo services (instead of Yahoo Messenger).

By default, it will show you only people that are online. To change this, go to "Buddy" tab, and select "Show" then choose "Offline Buddies" and it will reveal your entire contact list.
