KeePass is a free, open-source password manager that serves one main purpose: to help you store all of your passwords in a secure database. You have to remember only one main password that allow access to all other passwords stored in that database. If you don’t want to use a password use a key file or you can use both of them - the choice is yours.
The database that contains all of your passwords is well-protected. It is encrypted using the well-known algorithms AES and Twofish. KeePass is easy for beginners and complex for advanced users, for a full list, check all KeePass features. Here is a graphic representation of what I said. The first image is the KeePass logo, I forgot to write that.

Instead of listing all capabilities, I would like to show you how to add a password and create a database using this powerful password manager. If you’re looking for a quick introduction, a quickguide or Let’s say a short KeePass tutorial, this would be it. You can obtain KeePass from here. Once you have the setup file, install the application. It will create a shortcut on your desktop:

If you open KeePass for the first time, you need to create a database. Go to “File” and select “New”.

As you can see, you are required to create a new database and the most important thing to remember: you need to add a master password. To keep everything simple, I will choose the traditional method - I will type a powerful primary password and that’s it, I am not going to use a key file or both of them.

As a confirmation, you will be required to enter the same password one more time. It must be the same password so be careful (they must match).
Important: Make sure that you don’t forget this password. If you forget the password you can’t recover all the other passwords. That’s the most important rule to remember.

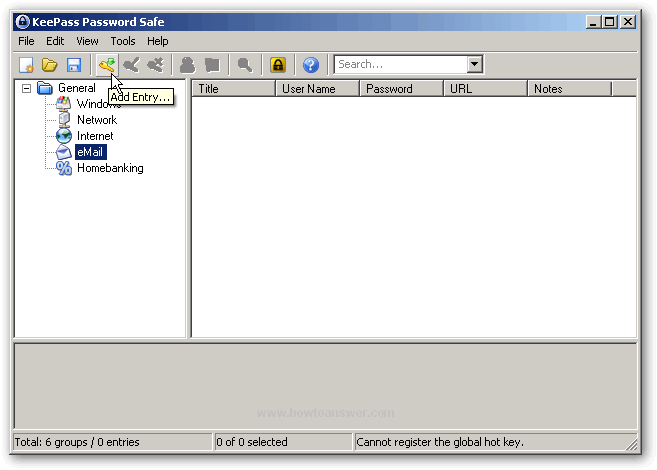
You added your primary (master) password. Now you can see the program interface for the first time. From here you can perform several actions - all features are available but use them later, when you get familiar with this software. Let me show you how to add a password using KeePass. Let’s pretend that I want to add my email username and password, I will choose “Email” and click on “Add Entry” button.
A new window named “Add Entry” will open. I will store my Gmail account username and password and other details.
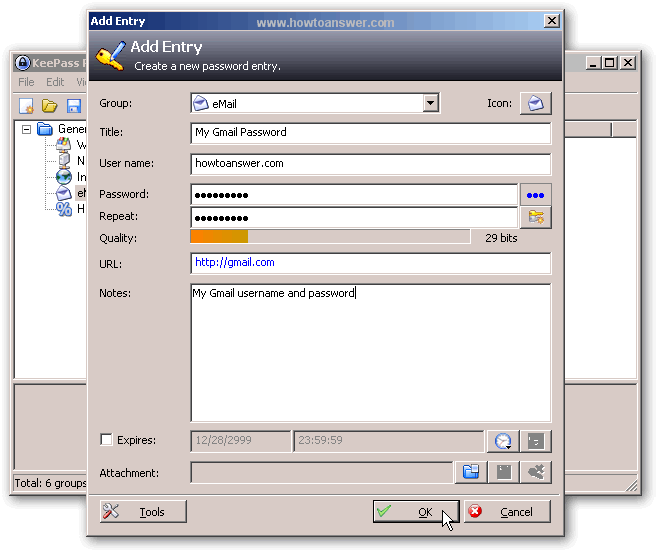
As you can see, all details have been added to a group. You can actually read all details except for the password, which is hidden.

Let’s see how we can use KeePass. This is just an example, you can use it in many other ways. Since I am lazy, I will use the “Open URL (s)” command.

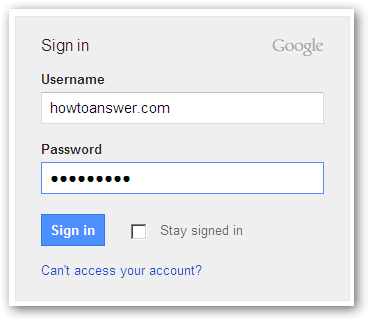
Did you notice that I added an URL when I completed all details? I added the URL to save time for future logins. If I choose “Open URL (s)” it will take me here, in this example - the Gmail login page:

As I said, you can perform this action in several ways. In this example, I will do it automatically. Actually, this command will do it -”Perform Auto-Type”.

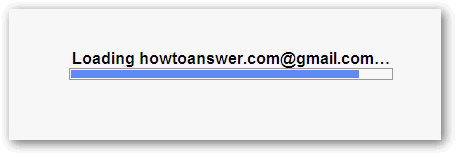
When I did this, KeePass returned to Gmail login page and automatically filled the username and the password for me.
Gmail accepted the username and password so here it is, the webmail interface is loading. Each time when you add a new password, test everything to make sure it works - I`ve did this in a couple of seconds.
I have a database, I successfully added my first password but I did not save it. Make sure that you don’t close the program, not yet. Save the database first. To do that, go to “File” - choose “Save As”.

Save the database in an easy-to-remember location, I will save it in “My Documents”.
Important: I recommend you to save this database in a different location just in case something bad happens to your computer. It’s tiny, just copy and paste it on a USB stick, external HDD or burn it on a DVD - make a backup regularly.

That’s how it looks when you save a database file using KeePass. Take a look at this image.

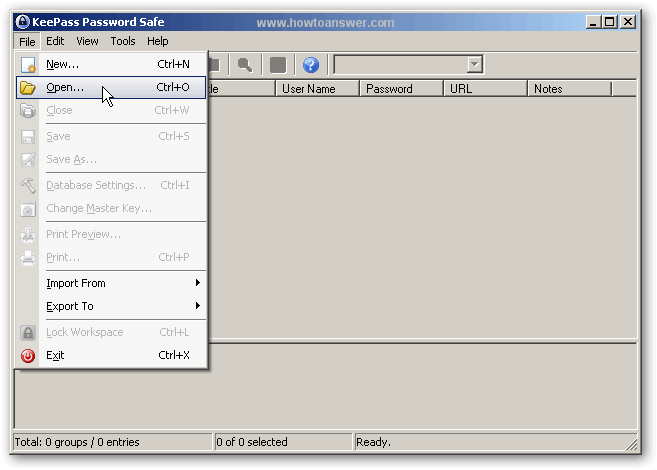
That was easy but I would like to show you one more thing: how to open the database next time when you want to add a new password. Make sure that you close the application (Exit) and open it again. As you can see, there is no need to press “New” unless you want to create a new database. I will choose “Open”, as we already have a database. I do not need more than one database.
I will open my previously created database, located in “My Documents”. Select and click on “Open” and it will load.

You may have noticed a small difference. The window looks the same but the message is different. Instead of “Specify a Master Password” now you’re required to “Enter” the password to unlock (open) the database.

TWO THINGS TO REMEMBER: whatever you do, make sure that you don’t forget the master password. Also, it is a good idea to save your database to a different location just in case that you lose access to your computer (malware infection or hardware failure). If the database is gone - you will lose all the other passwords. KeePass was rated as the best password manager by HowToAnswer.