This article is an introduction to DirSync Pro software - a powerful, mature, portable, open-source and cross-platform backup software.
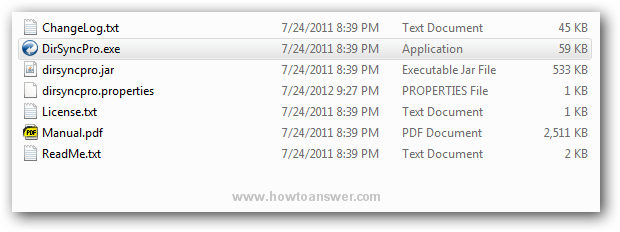
Short DirSync Pro review: If you need to back-up your files and you need a free utility, try this application. It will work on most popular operating systems such as Microsoft Windows, Max OS X and Linux. The only prerequisite is Java. Powered by a powerful graphical interface, DirSync Pro will help you to make incremental backups, synchronize files from your computer to almost any external device that connects via an USB port. It has a huge list of features and if you need to use advanced options, the best help that you can get is his own Help Manual (PDF format) that comes with the program (extract archive and check Manual.pdf).
My intention was to provide a short introduction over DirSync Pro capabilities. If you need to backup files, this is an excellent choice but don't forget that this article is for novice users and the program can do a lot of other things (read his Manual). That being said, download DirSync Pro (homepage) and open the program. To do that, extract the content of the portable archive or run the application directly from the archive - for me it worked both ways.
In order to start the program click on DirSyncPro.exe or dirsyncpro.jar (both of them will work in Microsoft Windows). For Linux and other operating systems you can launch the program from the command line (read ReadMe.txt document)
When you open the software interface for the first time, a pop-up window will require you to accept or decline the License Agreement. This window will show up only for the first time. Choose "I Accept" and you will see the DirSync Pro graphical interface for the first time (I resized the main window a little bit).

If you never used a backup program or a similar tool before it may look a little complicated at a first look but it's easy to use. You can use it for simple backup operations and when you need to perform complex tasks (I repeat, check his helping guide - Manual.pdf that comes included with the program)
In this example, I will use DirSync Pro to make a backup of a folder located on my computer. The files will be copied on an external USB device (stick).
The first thing would be to create a new Job or edit an existing one. For keeping things easier, I will create my own Job. You can achieve the same result by going to "File" and select "New" or simply click on "New" button and a new window will open.
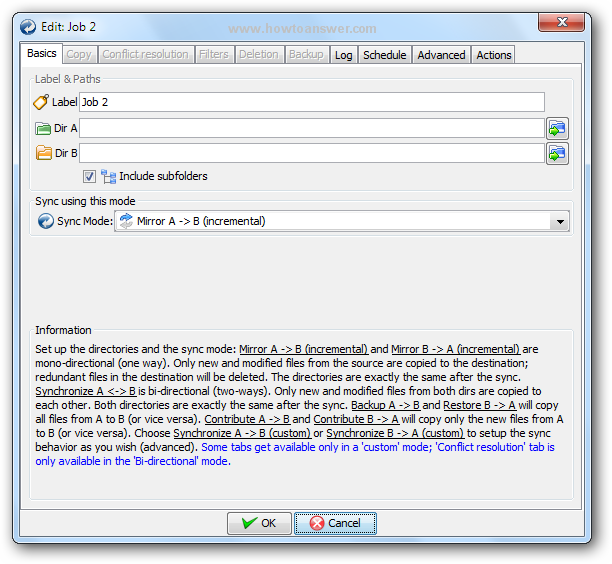
Obviously, the window requires several fields that needs to be completed. If you need further explanation, I have taken the time to comment all sections.
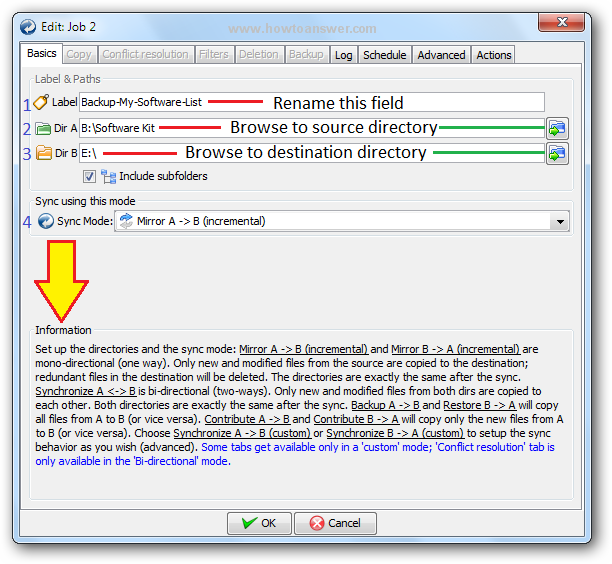
Label: As you noticed I renamed this label to "Backup-My-Software-List". You are not forced to provide a name but it will ease your work later when you need to back-up a lot of things and you don't know which backup belongs to what you need.
Dir A: From here you can browse to the source directory. Just click on it and navigate on your computer to the folder that you would like to backup. You need to select the desired folder and the program is smart enough to copy everything that's inside.
Dir B: This is the destination directory. Just be careful here. A backup should be made on a different device and not from one computer partition to another located on the same hard drive. So you should choose a different device - in this example I used an external USB stick.
Note: Include subfolders option should be checked.
IMPORTANT: Make sure what method you choose. In this example I have used a clean (blank) USB stick and I didn't specified a destination folder. If you have OTHER existing information on your external USB device and you don't specify a destination folder, using the default method, the program will delete any other file that doesn't match the original SOURCE. So, please BE CAREFUL !
Sync using this mode: Mirror A - B (Incremental). Most of us will want to use the first sync method (this is the default method) but if you require additional help there is an explanation right under this option.
So I've completed all required fields and I am ready to back-up my files. All I need to do is to click on "OK" button. Once I do this, the window will close and I will see the program interface. The only difference is that now I can see my work added on the backup list. Obviously, if I would need to modify anything I would click on "Edit" button and make the necessary changes. But that's not the case here, I am ready to start the backup so I will click on "Play" button" - I have highlighted that button.

When you click on "Play" (Synchronize) button the program will automatically switch to "Messages" section. However if you want to see the progress and the estimated remaining time click on "Jobs" tab (I have highlighted this).

When the program will finish his job you should see a similar window and at the end the following message - "Finished Synchronization!".

As I said, I didn't mentioned important features such as "Schedule" and many others. All of them can be found in DirSync Pro Manual so make sure that you read it. Finally, if enjoy using this free backup program consider a DONATION to the author.